This is part two of the blog I wrote earlier on getting started with HTML5 custom panels for CC tools.
So once you’ve got the tools set up, HTML panel development is entirely up to you. Your panel’s content runs inside an embedded browser instance (chromium embedded framework, I believe), so you can treat it as a modern browser and use whatever HTML5 tools or libraries you like best. The only things left to explain are a little about the panel’s properties, and how to hook into the native functionality of the CC tool your panel runs in.
Working with JS, JSX and the Two Javascript VMs
The first thing you need to know about custom panels is that you’ll be working with two separate kinds of scripts, which are executed by two different virtual machines.
One Javascript VM lives inside your custom panel, and is just like a regular browser VM to execute the logic in your panel. The other is the VM that lives inside the CC tool and has APIs to hook into native tool functionality. If your panel is running in Photoshop then this second VM is the ExtendScript engine, if you’re using Flash then it’s the JSFL engine, and so forth. What’s important is that they are separate VMs, with separate contexts, variables, and so on. It’s a bit like doing client-server development, except that you use JS on both sides, and the calls go back and forth synchronously.
So if you’re making a custom panel for PS or Flash and you want to define a button that does Select All, you’ll need one piece of script in the panel’s HTML source to handle the button press, and you’ll pass another line of script over to the tool’s VM to handle the tool’s functionality. In the case of Flash, the custom panel’s index.html could have code like this:
<button onclick="onSelectButton()">Select all</button> |
As you can see, script is passed over to the tool’s VM as a string, and you get a callback with the code’s result. CSInterface is a utility object injected into the custom panel’s VM. For documentation on CSInterface, check out Extension Builder 3 > Help > AEB3 Start Page > Docs and API Reference.
Of course code like the above works fine for single lines of JS, but writing complicated code in strings quickly gets tedious. So the standard practice is to define code meant for the tool VM in a separate file, called .jsx by convention although it’s just regular javascript, and evaluate the whole file in the tool VM at startup. (Code to do this dynamically can be found in the default panel template, or you can just use the bundle manifests Script Path setting, explained below.)
Another handy way to pass code over to the tool VM is to use the little-known fact that calling a function’s toString() method returns that function’s source definition. So you can declare a function in the browser VM, then pass over its toString() output to be evaluated in the tool VM, like this:
function countObjects() { |
And lo, the function gets declared and then executed in the tool VM. You can easily pass over anonymous IIFEs in a similar manner:
cs.evalScript( |
So far, so good. Next up:
Editing the Bundle Manifest
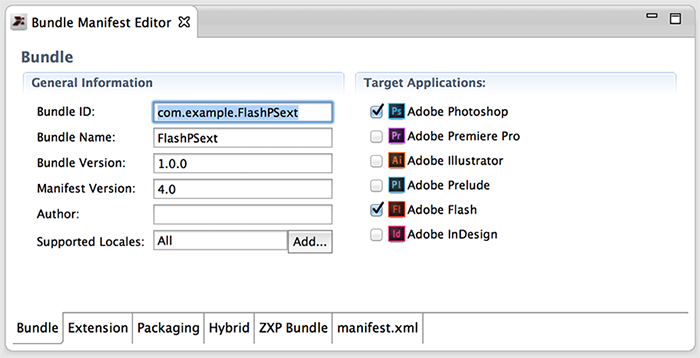
The other thing to keep in mind is, at some point you’ll definitely need to edit your panel’s metadata and packaging options, but as it happens the way to do this is pretty well-hidden. Here’s the secret:
- In Eclipse’s explorer panel, right-click the project name (not the other files in the project!)
- Select Adobe Extension Builder 3 > Bundle Manifest Editor.
Basically everything about your panel except the HTML source is configured here. Some of it is container settings, like your panel window’s initial and min/max sizes, and many of the fields (like Author, Supported Locales, etc) will only be important if you deploy the panel to Adobe Exchange.
Among these settings, one that deserves note is the Script Path, which is in the Startup section. Depending on which template you used to create your project there may already be a jsx file configured here. If a filename is present, on panel startup that file will be executed in the tool VM (as if it had been loaded via evalscript, described above). Also, if you remove the template’s default jsx file without updating this manifest setting, you’ll get weird errors.
Incidentally, in this same section you can configure your panel’s root document - the panel manager doesn’t automatically load index.html, it will use whatever you specify here.
And that’s officially everything I know about HTML5 custom panel development for CC tools. Let me know what you make!

